
A lot of expats prefer to share the adventure in China with their friends back home. Legends say starting a WordPress blog in China can be painstaking. That’s bullshit. All you need is a VPN service to get started.
Update 2: Published a new guide on how to start a blog.
Update 1: I highly recommend RamNode servers also. Their servers are dirt cheap compared to managed hosting solutions. Contact me on WeChat @mighil if you need help setting up a website based on RamNode servers.
WordPress in China: Everything You Need to Know
No, wordpress.com blogging service is blocked in China.
Yes, you can self-host WordPress CMS on your server. However, it’s best to avoid plugins and themes that rely on Google services and other blocked resources. In fact, jotzilla.net is based on WordPress, and my website works in China without any problem.
Depends. You’d only need an ICP license if you plan to host your WordPress site inside a server in China mainland. In short, you don’t need an ICP license to run a blog or website in China. However, an ICP license is essential if you plan to collect payments in RMB through your website.
No. You can self host and set up everything by yourself. I created this blog post for self-learners like you. And if you still need help, I can assist for a small fee.
Why A Self-hosted WordPress Blog in China?
Dedicated hosting can be pricey since they come with one-click tools. A lot of blogging platforms doesn’t work well in China as well.
So, it’s wise to host your own WordPress blog. I’ve prepared this ultimate guide to teach you how to make a self-hosted personal WordPress website in China.
Note: This post contains 2 affiliate links and a referral link. Which means I will earn a small commission when you purchase using my links. No extra cost to you.
If this guide sounds too much of a tech jargon:
You may hire me to set up a WordPress blog in China.
Prerequisites:
a. VPN
Assuming you’re an expat in China; VPN is essential. A lot of websites I’m going to mention below doesn’t work well in China. Feel free to use my affiliate link in the sidebar to sign-up with Express VPN. Their services are reliable.
b. Domain name
A domain name is an identification string that defines a realm of administrative autonomy, authority or control within the Internet. You know the drill; go ahead and buy a domain name that reflects your brand name.
I prefer NameCheap over Gandi.net since it has got a faster interface. Go ahead and use my affiliate link (starts from 0.88USD/year) if you prefer to register a domain using namecheap.com.
c. A Virtual Private Server (VPS) to host your website.
A Virtual Private Server (VPS) is a virtual machine sold as a service by an Internet hosting service. Many companies including Aliyun in China offer virtual private server hosting or virtual dedicated server hosting as an extension for web hosting services.
There are several challenges to consider when licensing proprietary software in multi-tenant virtual environments. With unmanaged or self-managed hosting, the customer is left to administer their server instance. However, shared/dedicated hosting + cPanel in China can be pricey.
Services like Hostgator comes with one-click options, but you’ve got to pay the price for the same. So, we’ll be self-managing a DigitalOcean droplet (VPS) based on Ubuntu or CentOS.
Why DigitalOcean?
Even though, DigitalOcean is not for everybody. As a beginner, it’s something I’d recommend. You can learn a lot more about VPS in general when you start from scratch without anyone’s help. Feel free to join DigitalOcean using my referral link.
d. Putty or Terminal and WinSCP or Cyberduck
Putty or Terminal
You’d need an SSH client to login to your VPS.
PuTTY is an SSH and telnet client, developed originally by Simon Tatham for the Windows platform. Use Terminal if you’re using a Mac.
WinSCP or Cyberduck
Not everyone is a Linux savvy. As a beginner, you won’t be flexible with using Linux commands to move/copy and edit files. Hence you’d need an SFTP/FTP client to view, edit and manage the data on your server.
WinSCP is a free and open-source SFTP, FTP, WebDAV, Amazon S3 and SCP client for Microsoft Windows.
I suggest Cyberduck for Mac users since I use it often. You have other options like FileZilla for Windows and Transmit for Mac. Use any SFTP software you’re comfortable with.
e. Others
- You’ll be using VestaCP (free and open-source control panel) as the default VPS control panel to host the WordPress website on your server.
- For the managed DNS part and to speed up your website in China, I’d suggest Cloudflare since their interface is sleek. They also provide a free SSL. Having a Cloudflare generated SSL certificate is crucial since Google will be counting HTTPS as a ranking factor. Go ahead, visit cloudflare.com and create an account right away.
I hope you’ve got a basic idea now. Fire up ExpressVPN, let’s start a WordPress blog in China.
A. Buy A Domain
Purchasing a domain on NameCheap is pretty much straight-forward. Sign-up, search for a domain name of your choice, add it to the cart and make payment. After the purchase, visit this URL and click “manage”.
Note:
- You can purchase a .cn domain and host it outside of China with the help of Chinese friend.
- You don’t need a China ICP license for hosting the .cn domain outside of China.
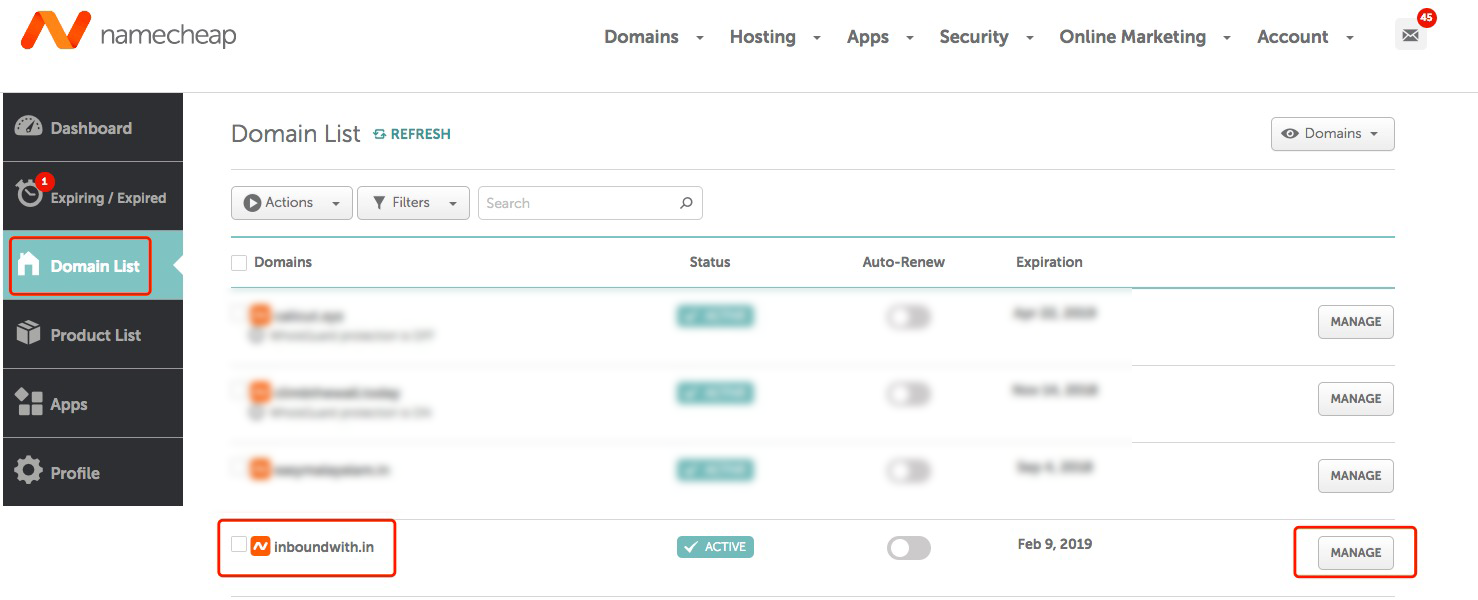
Once you click “manage”, you’ll see something like this.

Keep the browser window idle and proceed to the next step.
B. Add Site to Cloudflare
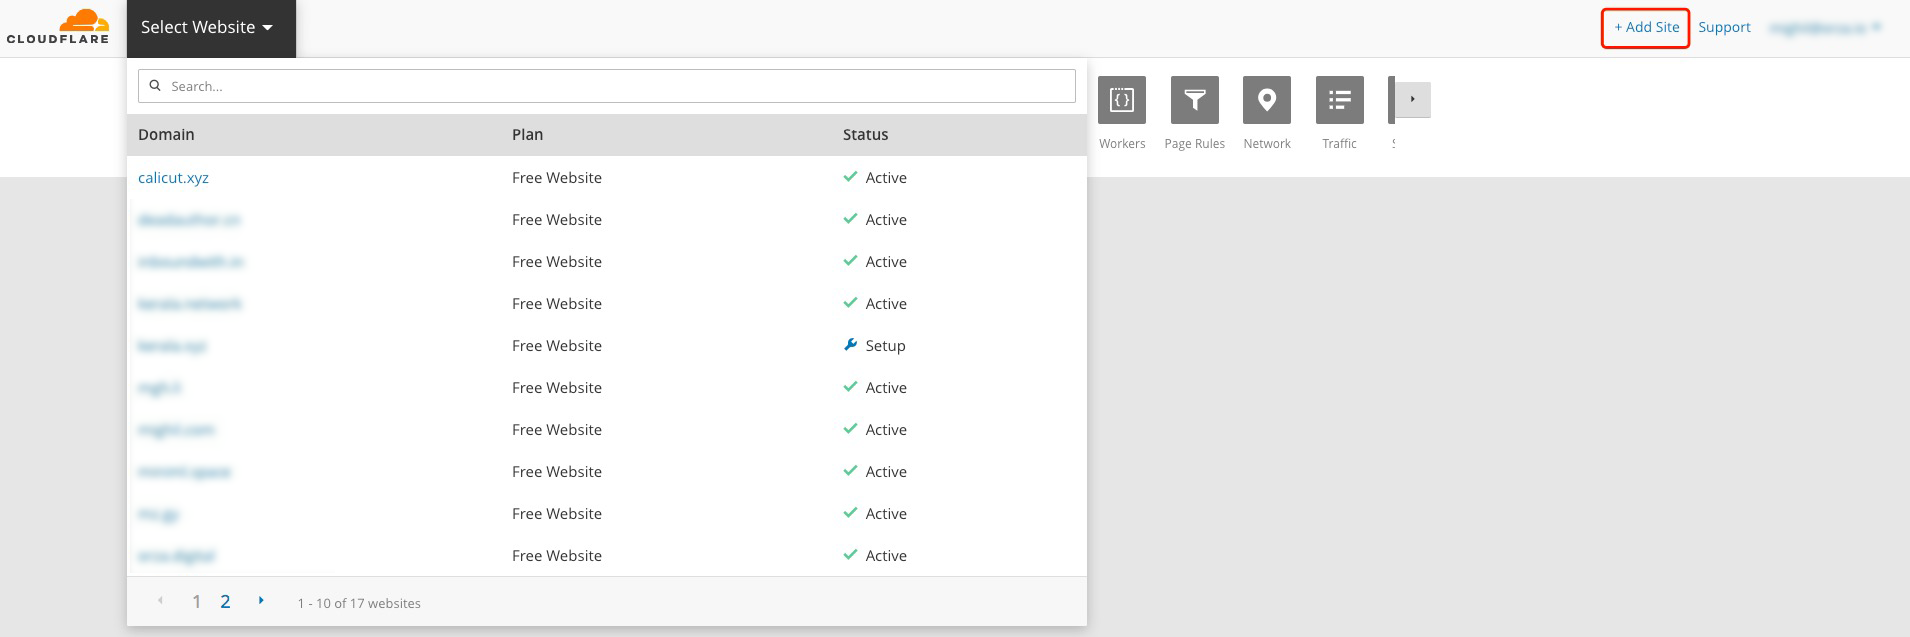
Visit cloudflare.com and log in to your account. Visit this URL or click “+ Add Site” located in the upper right corner.
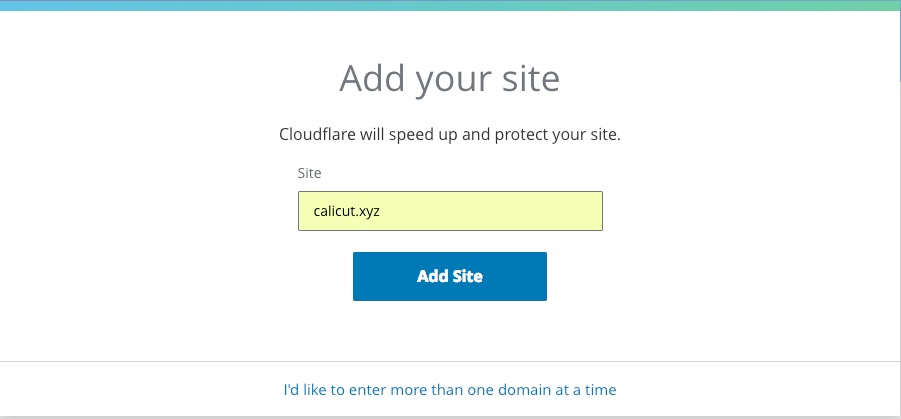
Now fill in your domain name and click “Add Site.”
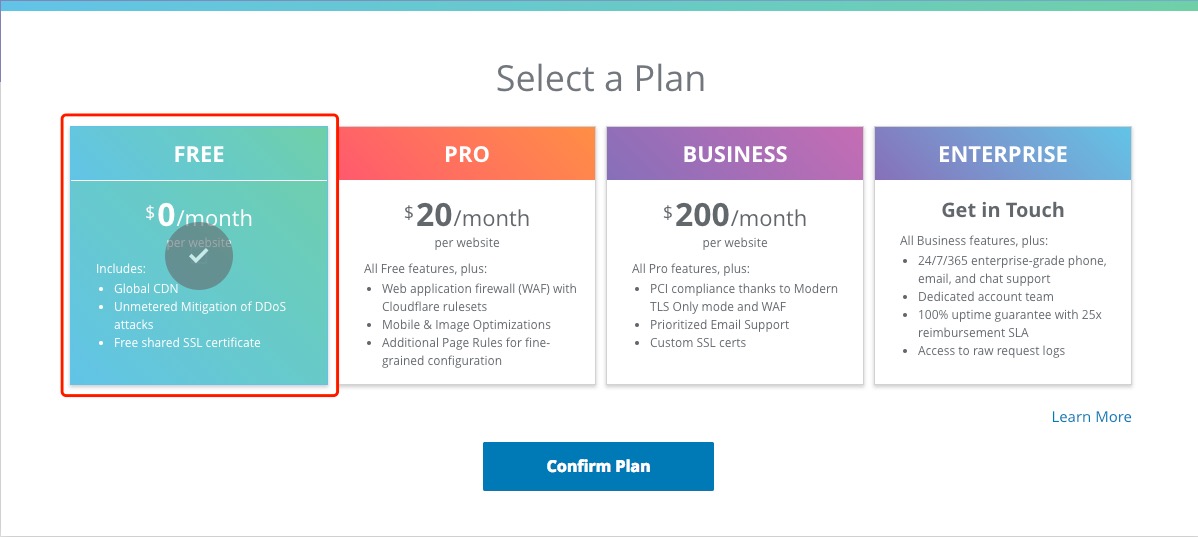
Click “Next”, select the free plan and click “Confirm Plan.”
Now, wait for Cloudflare to finish querying your DNS records.
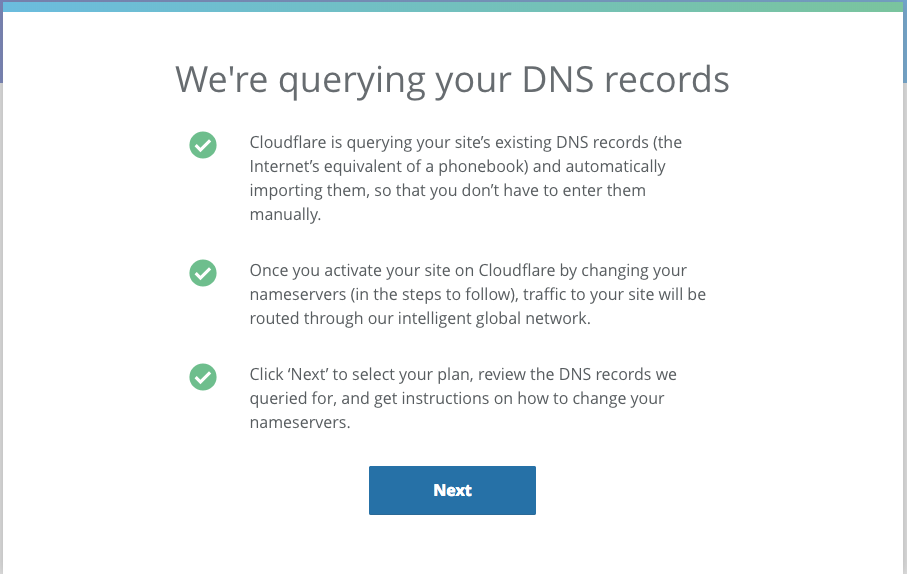
Usually, Cloudflare will return your current DNS settings (aka NameCheap default settings). But sometimes it may display an error like “we are unable to find your DNS settings.” Just click “Next”.
As you can see below, Cloudflare will ask you to change your nameservers.

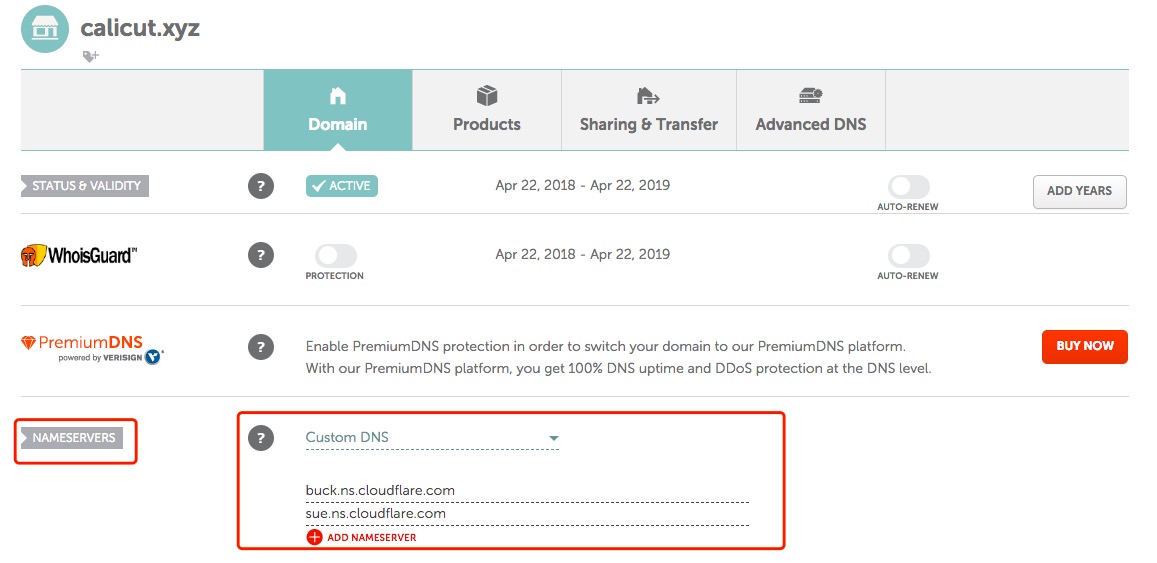
Visit the idle window I mentioned at the end of step 1. Select the “Custom DNS” in the NAMESERVERS section and fill the nameservers as suggested by Cloudflare and Click save.
Switch the active window to the Cloudflare setup and click “Continue.” Give it a few minutes for the DNS propagation. The Cloudflare status will be “Active” after DNS propagation.
C. Create A DigitalOcean Droplet
DigitalOcean calls its cloud servers Droplets; each Droplet you create is a new server for your personal use.
If you are a new user, DigitalOcean will ask you either top up 5$ credit or add a preferred payment method.
I’d top up 5$ via PayPal since it’s the wise choice than adding a credit/debit card. Now sign in to your DigitalOcean account and visit the dashboard.
Click “Create Droplet” and refer to the screenshot below:

DigitalOcean VPS pricing starts from 5USD per month. Choose an ideal server for your personal website.
Since we are in China, I’d recommend Singapore location for hosting the WordPress site.
CloudFlare has got data centers in China, and it will make sure your website delivers content without any lag.
Go ahead and select the 5USD server if you are setting up a personal website aiming less than 10k users per month.
Note:
- You can upgrade and optimize droplets whenever you like.
- I’ve selected Ubuntu 16.04.4. You can choose CentOS 7.5 x64 as well. Keep in mind that Ubuntu uses apt with DEB packages, while CentOS uses the YUM package manager with RPM packages. In this tutorial, I will be using “yum” often. CentOS is believed to be more stable because it has less frequent updates to their packages.
- I highly recommend readers to learn more about SSH keys and generate/set-up SSH keys while creating a droplet. SSH keys provide a more secure way of logging into a virtual private server with SSH than using a password alone.
Click “create” if everything looks ok for you. DigitalOcean will generate Public IP, one-time root password and send it over to your registered email address.
D. Install VestaCP On CentOS
Step 1: Login to your server as root
Use the credentials DigitalOcean sent you over email to log in.
Open up Putty on Windows. Things are pretty much intuitive on Windows. If you find it confusing, read this article.
In case you are using a Mac, open Terminal, type the following and hit enter:
$ ssh [email protected]
Replace 67.218.xxx.xx with your server’s IP address.
After logging in for the first time, DigitalOcean’s Linux distro will force you to change the password. Just do it.
Step2: Install Vesta CP
Download installation script
$ curl -O http://vestacp.com/pub/vst-install.sh
Run it to start the installation
$ bash vst-install.sh
Ubuntu may ask you to force the installation sometimes. Run this command to do it:
$ bash vst-install.sh -f
It will ask you type in the host name and email address. It’s wise to not use your domainname.tld as the hostname.
Use something like cp.domainname.tld.
VestaCP roughly needs 5 to 10 minutes to finish the installation. It will display the login URL and admin credentials upon completing the installation.
E. Configure DNS
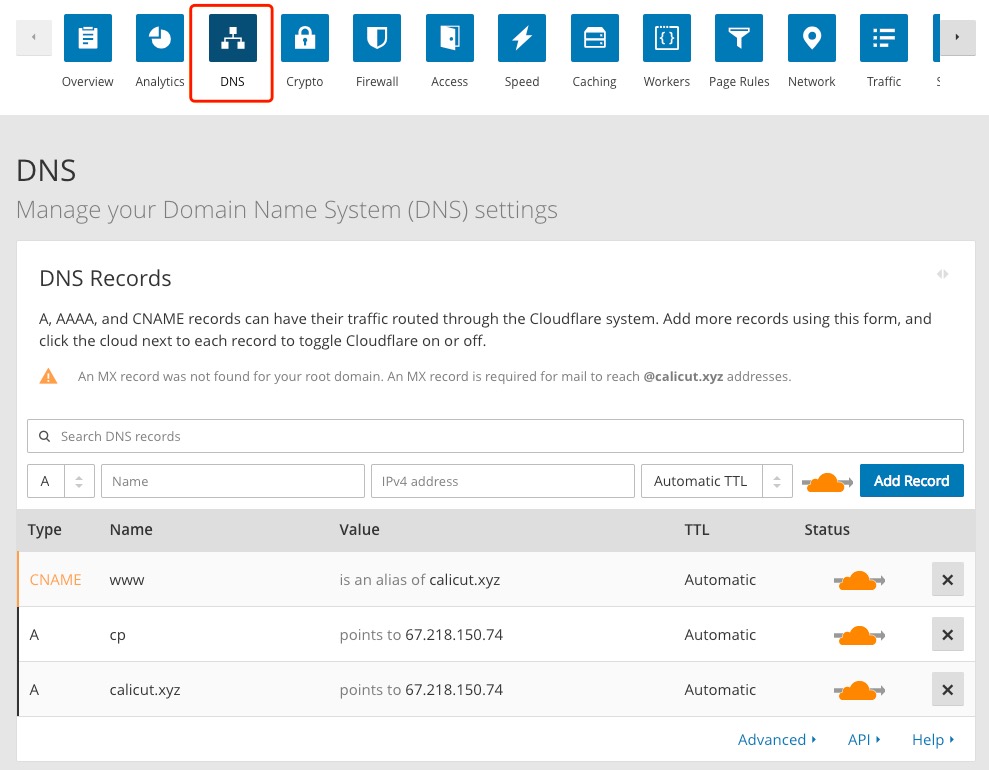
Visit the DNS section of your website in Cloudflare.com.
Set CNAME and A records as follows.
- A Record – Name: @, ipv4 address: 67.218.xxx.xx
- A Record – Name: cp, ipv4 address: 67.218.xxx.xx
- CNAME record – Name: www, Domain Name: @
Don’t forget to replace 67.218.150.74 with your server’s IP.
Make sure it looks like this after editing.
F. Add New Website on VestaCP
Step 1: Visit the VestaCP login URL.
It may look like https://67.218.xxx.xx:8083
Log in using the credentials you saved before. Change the admin password after logging in.
Feel free to tweak other settings according to your preference.
Step 2: Add a website
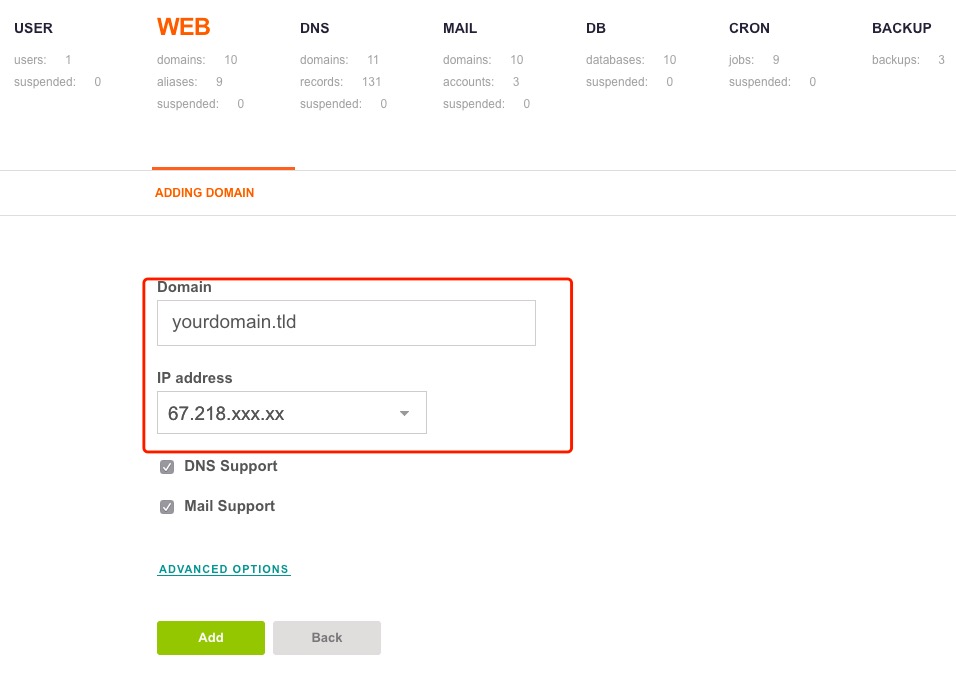
Visit the WEB section in the VestaCP and click the “ADD WEB DOMAIN” button.

Fill in the domainname.tld (eg: mynewsite.com) and select the default IP address. Click the ADVANCED OPTIONS and edit the Alias to www.domainname.tld. Click “Add” when you’re ready.
Wait for few seconds and visit domainname.tld. You’d see a dummy home page generated by VestaCP.
Step 3: Create a Database for WordPress
VestaCP has installed default software stacks required for WordPress.
You have to create MySQL database right now so we can use the same during WordPress installation.
To do this, visit the DB section of your VestaCP. Click “Add DB and fill in the details.
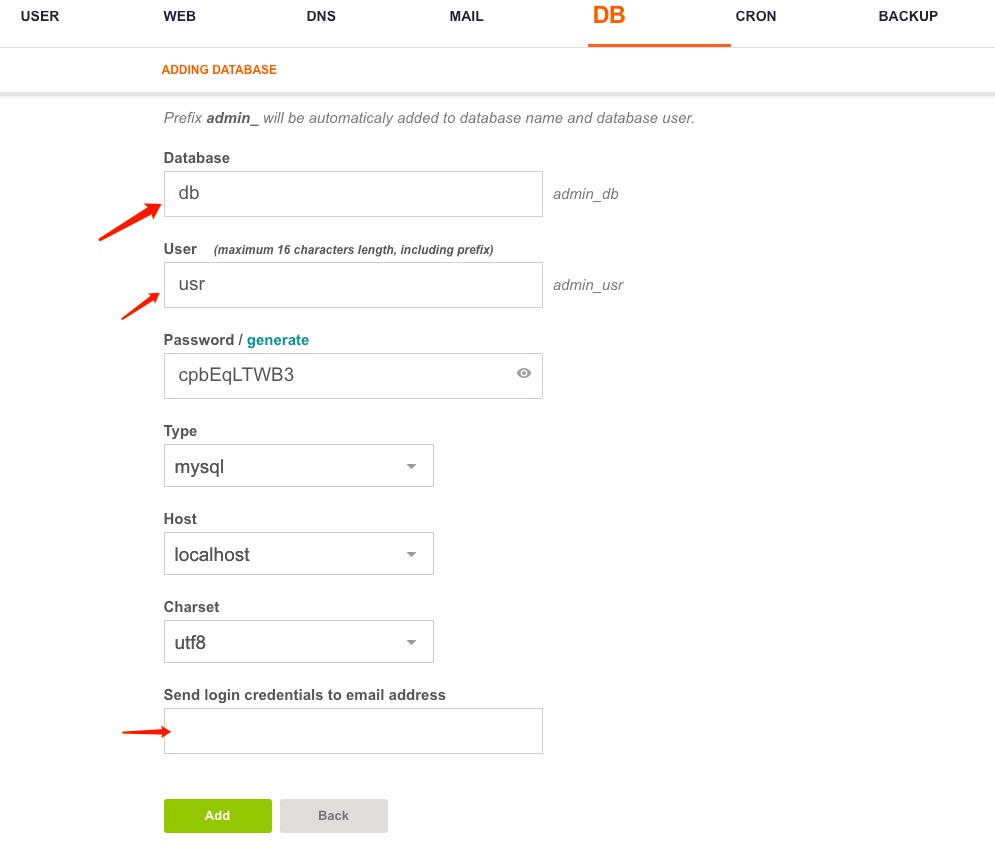
Note: Prefix admin_ will be automatically added to database name and database user. It’s a VestaCP setting by default.
Click “Add” when you’re ready. Save the database details somewhere safe.
G. Download And Install WordPress
Oh boy! we’re almost there. Let’s install WordPress already!
Login to your VPS using Putty/Terminal as root user. Use cd to navigate to the domainname.tld folder located inside the home folder.
$ cd /home/admin/web/domainname.tld/public_html/
Go ahead and download WordPress to the public_html folder using the following command:
$ wget http://wordpress.org/latest.zip
Now unzip the wordpress.zip folder by:
$ unzip latest.zip
Wait patiently and let it finish the thing.
Move it from wordpress folder to the public_html folder afterwards:
$ cd wordpress
$ shopt -s dotglob; mv -- * ..
Now go back to the public_folder.
$ cd /home/admin/web/domainname.tld/public_html/
Delete the default index.html file and the WordPress folder generated while unzipping.
$ rm index.html
$ rmdir wordpress
Now move the wp-config-sample.php to wp-config.php using the following command:
$ mv wp-config-sample.php wp-config.php
Now you have to edit the wp-config.php file. You may use WinSCP/Cyberduck to do the same.
Connect to your server using the root credentials. Open the wp-config.php file located in /home/admin/web/domainname.tld/public_html/
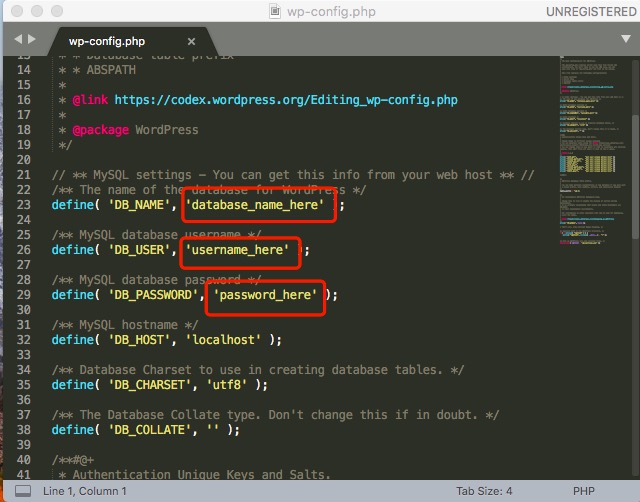
Replace database_name_here with the database name you’ve generated on VestaCP. Fill in the username, password as well and click save.
Open Putty/Terminal again and log in to your VPS as the root user.
Run this command to set chown rules for VestaCP admin user:
$ chown -R admin:admin /home/admin/web/domainname.tld/public_html
It will come handy when you’re about to install a new theme/plugin on WordPress.
Now visit your website and finish the WordPress installation.
Read this guide to setup CloudFlare flexible SSL for your WordPress website.
That’s it, happy WordPress powered blogging in China!
➥ Chat With China Web Consultant
If you have set-up a new blog about your life in China feel free to share the link via email. I’ll add you to the “great success” list.
Direct all technical questions to WeChat: mighil.